After 8 long weeks of hard work, struggles and triumphs, I am so excited for the post that we all have been patiently waiting for... the reveal! After countless long days and nights, I am thrilled that the project came together within the timeline as planned.
In case you would like to see the progress that I made to get to this point, you can read my earlier posts here:
The Beginning
A sad forgotten room in our 120 year old Dutch Colonial home.

After some careful planning, here were my sketches:

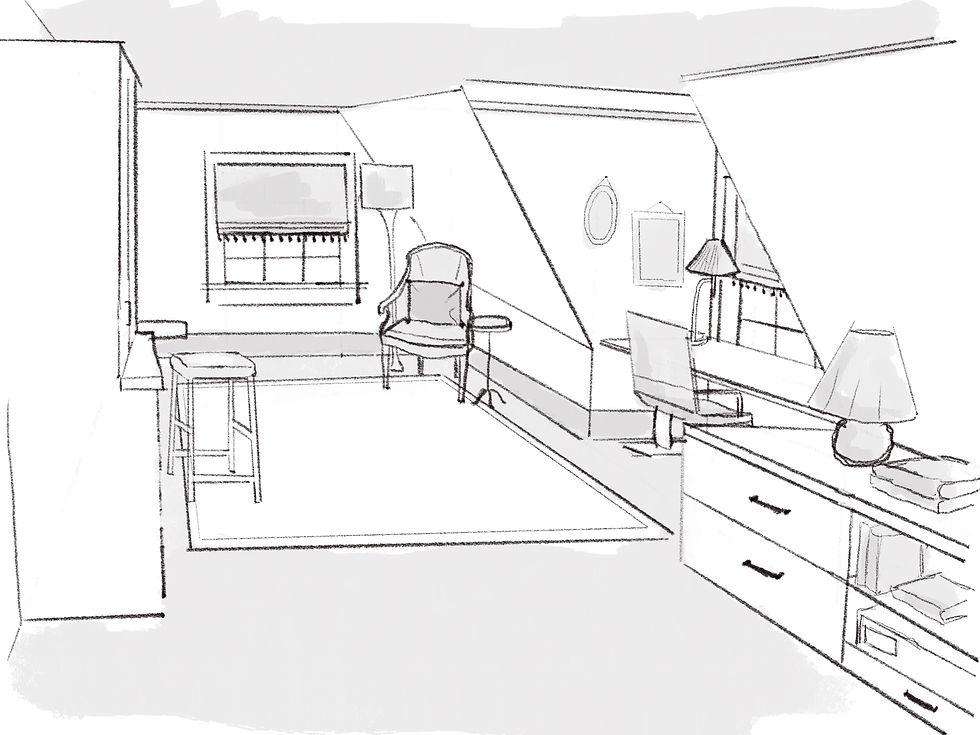
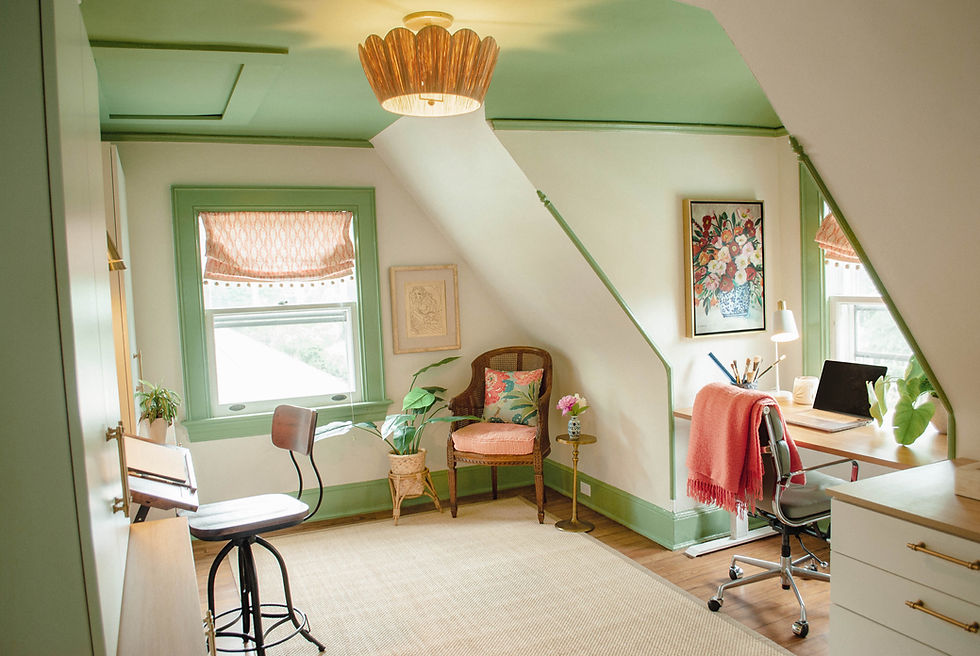
The Reveal
And... ta-da! The beautiful end result.


Accomplished Goals
Storage
My goal was to build enough closed storage to neatly house all of my samples, swatches, papers, books, and other physical materials in an easily accessed location. The cabinets that we built perfectly anchor the empty wall of the room, and create more than enough sturdy storage for many years to come.
On the other side of the room we built a low storage unit that stores my hanging files drawer, a pull-out printer drawer for easy access, and counter space for shallow drawer materials.
Due to budget constraints, I was not able to build custom cabinetry, however the creative team at Definitive Closets and I came up with a creative solution to utilize closet materials and construction methods to build custom units that accomplish all of my goals, but at a more affordable price. While I will always long for detailed millwork, I am extremely happy with how these turned out.
Work Surfaces
I found a two-part solution to my office work surfaces:
A standing desk for my laptop work that needs to stay clean and focused. I love that this is in the window to maximize the amount of cheerful natural light, and the fact that it has a standing desk function to help handle long hours in front of the screen.
A studio surface. This surface is adjustable to give me the ultimate flexibility for when I work with various mediums. It is also affordable enough that I will not be scared to play on it and get messy!
Lighting
I needed as much light over my studio surface as possible, so without a window I added two adjustable task lights on the wall above the desk. Task lights add another level of flexibility to the space, and having two light sources rather than one reduces the amount of dark shadows on the surface below, which is important when creating art.
The flush-mounted light on the ceiling was added to bring a much-needed general light source. It adds a beautiful soft glow to the room.
Lastly, the corner of the room with the built-in cabinet felt very dark but there was no way to put a corded lamp due to the outlet being behind the built-in, so I decided to source an adorable wireless lamp from Pooky Lamps which added the perfect bit of brightness and personality to the corner.
Uplifting and Creative Space
My highest priority was for the space to feel inspiring, energetic, and creative. With that in mind, I picked a selection of patterns and colors that energize me and immediately catapult me into a better mood. The zesty coral (my current favorite color) paired with a natural creamy green immediately transports me to a more relaxing (even, tropical?) place. The colors added a perfect pop of freshness, and when mixed with deep wood furniture with vintage touches it tied in nicely with the historic nature of the home.
The Recap
I am SO incredibly proud of how this project turned out. I am proud of myself for believing in my vision and sticking to it even when unforeseen obstacles forced me to alter the path, and I am impressed that I was able to coordinate all of the moving pieces in such a tight timeline to have them completed by the deadline.
I accomplished just about everything that I set out to do. While I hired experts to install the parts that I knew I would be incapable of doing solo (cabinetry and electrical) and lots of drilling and furniture lifting completed by my patient husband, it is very satisfying to prove to myself that I was capable of handling the rest of the room myself. As a long-time city dweller and apartment renter I have never DIYed anything before, so now that we are in our own home this was a great learning experience.
At the end of the day, what I am the most grateful for is the One Room Challenge community.
The support of the community pushing each other on each week is truly the only way a personal project such as this would ever have been completed in such a short timeline. I now have a personal oasis and creative space for myself that I would never have prioritized for myself previously knowing how long our list of "more important projects" always is, so having it done feels like such a weight off my shoulders.
If looking for more inspiration, check out the other talent's 8 week reveals on the ORC website. I am so impressed by what this community has accomplished.
Thank you so much to those of you who have been following along this beginner DIYer's journey. I can promise you that because I had so much fun, this won't be the last project I will be documenting, so stay tuned for more.
But first... time for a well deserved break :)
x Brielle
Sourcing
Wall Paint - Farrow & Ball’s Au Lait (Color match to Benjamin Moore)
Ceiling Paint - Farrow & Ball Yeabridge Green (Color match to Benjamin Moore's Waterborne Ultra Flat Ceiling Paint)
Trim Paint - Farrow & Ball Yeabridge Green (Color match to Benjamin Moore in High Gloss)
Cabinets - Custom from Definitive Closets
Raffia Flush Mount Light - Crate and Barrel
Safevieh Rug - Amazon
Adjustable Wood and Metal Stool - World Market
Cordless Table Lamp - Pooky Lighting
Jonathan Y Swing Arm Sconce - Perigold
Adjustable Drafting Table - Walmart
Decorative Chair - Vintage
Fabric for Chair Cushion - Fabricut (Stroheim Jackie DG 01)
Fabric for Chair Pillow - Schumacher (Enchanted Garden)
Roman Shades - Created custom by Sew Lovely by Kelly
Roman Shades Fabric - Kravet (Felloe-12)
Roman Shades Trim - Kravet (Monkey Fist: Salt)
Floral Print - Poppies Chinoiserie Vase
Poster - Dolce Far Niente
Gold Stencil Artwork - A custom piece gifted to me from my extremely talented and creative friend @stephwilla
Everything not linked was existing from my home!

Great use of space! Love the accents of green too 💚!! Glad we turned the corner of the ORC-